

I love turning 2d shapes into 3 dimensional objects. Usually this involves cutting out the shapes and gluing them together in rectangular configurations. There are lots of box generators for laser cutting, my favorite one is Boxes.py where you design everything from a simple box to boxes with hinges, compartments and drawers. They have a section called “Boxes with flex” that incorporate a technique called living hinges to make 2d rigid materials bendable. I had also been seeing a number of dice tower at conventions.
One of the complaints I have heard from friend playing role playing games with lots of dice is that dice towers are a challenge to transport. Another feature with 3d objects created from 2d shapes is that they can be disassembled into their 3d components.
There are plenty of dice towers that assemble from purely flat sections, so I wanted to do something different and design a laser cuttable dice tower with living hinges.
Learning how to create a living hinge
You can download living hinge patterns and them paste them over your 2d design and hope they work, but that isn’t really design so I needed to learn how to create living hinges from scratch. I watched numerous videos, and the one that finely showed me how to do it as the live stream by Jason Lichtman called 360 LIVE: Mastering Wooden Living Hinges. In the video, he walks the audience through the process of creating a laser cut walnut glasses case using 3d modeling and living hinges in Fusion 360.
Part of the workflow involves using Sheet Metal Tools to bend and reflatten the model.
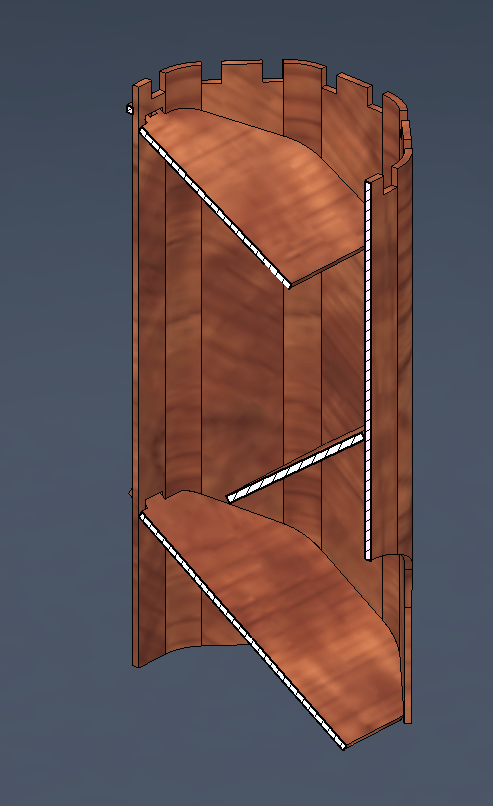
Using what I had learned I was able to create a tower out of an octagon with rounded corners (where the living hinges go) and a small break allowing me to flatten or bend as needed.
With the model in its bent shape, I added the shelves, cut away the doorway, added tabs to the shelves and cut away from the towers to slot the tabs. Because the laser cutter only cuts perpendicular to the material, I had to compensate for the angles of the tabs in the slots I made.
The tabs are intentionally placed on the flat sections of the tower to avoid breaking the living hinges.
My first design is shown on the left minus the living hinges. To add those in, I followed the instructions from the video and then got stuck figuring out what the dimensions needed to be to bend to the radius designed.
I tried to find an equation that would let me enter the corner radius, the material and would determine how thick each section of the hinge would be. The math gets really hard and even harder with wood because its properties vary throughout the natural material.
After striking out there, I decided to prototype and test. I took the spacing used for walnut and created my living hinges. Because I had the doorway cut out in the middle to deal with, I decided to make the living hinge one third the height of the tower. Using the rectangular pattern command, I replicated the living hinge cut pattern to each of the eight rounded corners and three high (excluding the instances in the doorway). I then adjusted the cut lines over the doorway to line up with the outer shape of the tower.
On the top and bottom shelves I added a little Pi shaped lock to hold the wrapped tower in place. Quite to my surprise and excitement, the living hinges were flexible enough to bend and the shelves fit perfectly. Even the locking mechanism worked as intended. I disassembled the dice tower and packed it up to take on vacation with a number of gaming friends. I showed them version 1 of the tower, let them put it together (without instructions), roll heavy metal dice with it, take it apart and use it. The dice tower survived the week, got several uses in D&D style games and packed up nicely to come home.
Version 2 – Enhancements
While the initial design was a solid success, I noticed a couple areas for improvement.
- The locking mechanism was a weak point
- The size was not easy to transport in a backpack
- The middle shelf could detach with only minor handling.
So, while on vacation, because I enjoy this kind of thing, I started making design improvements. First thing I did was shrink the design to be about the size of a D&D book. This is way more than simply scaling the model, as all the tabs and slots are dependent on the thickness of the plywood which wasn’t changing and the living hinges are dependent on spacing between the cuts. I’ll write more in the next segment of this design journey.
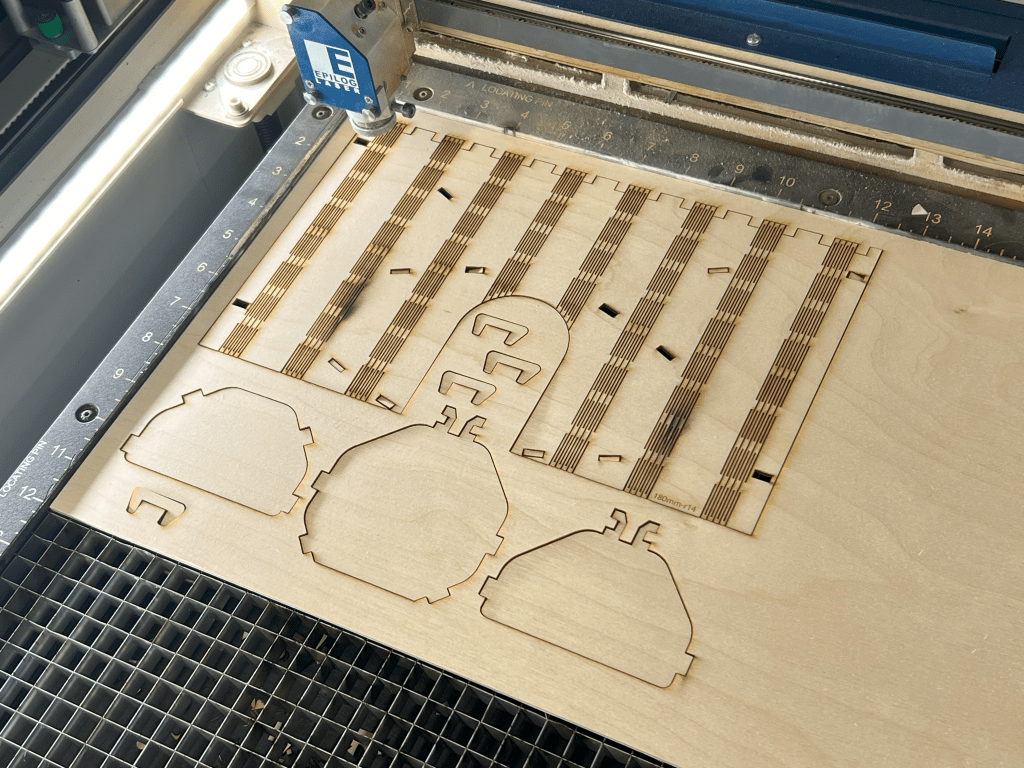
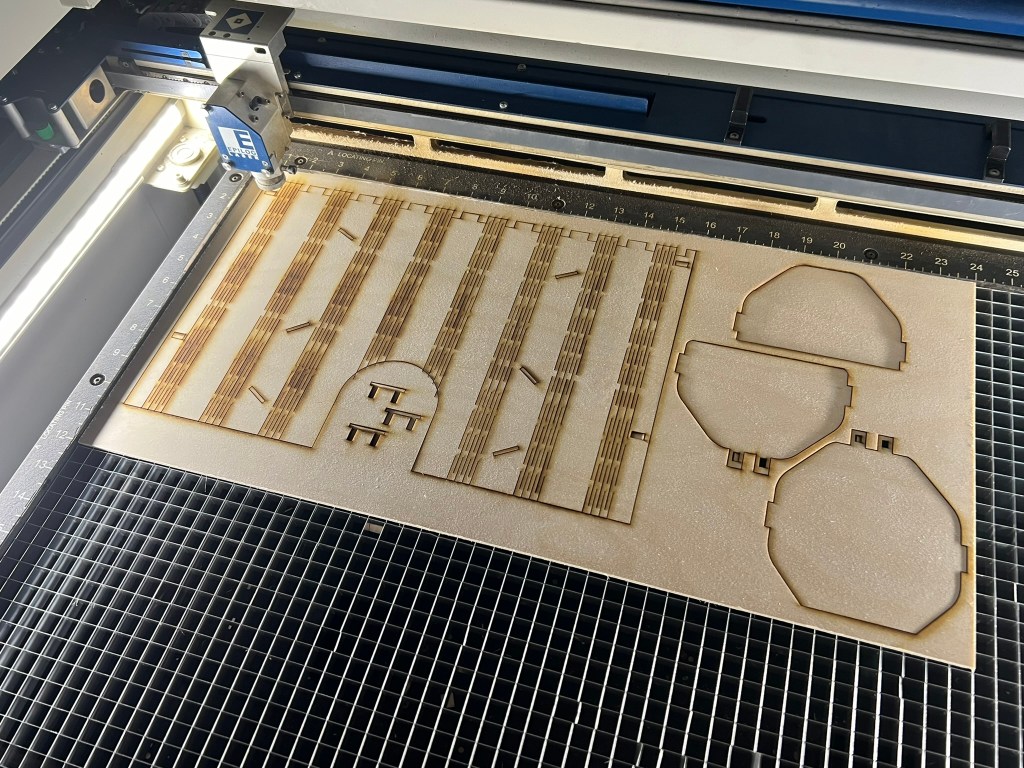
Cutting out version 2 after all the enhancements
To be continued…

Leave a comment